Neat Slider Plugin
- Created: 15/08/2014
- Latest update: 013/08/2014
- By: Energetic themes (Amjad Ali)
- www.energeticthemes.com
- Support: Issues page of the plugin on Github
Hey! First of all I would like to thank you for Interesting in my plugin! . If you have any questions that are beyond the scope of this help file, please kindly use the Issues page of the plugin on Github.
Informations about Updates and New Themes are always announced on Twitter and Facebook. Join us on Twitter, Facebook and stay update. :)
WordPress Installation
Follow the steps below to install theme via WordPress.
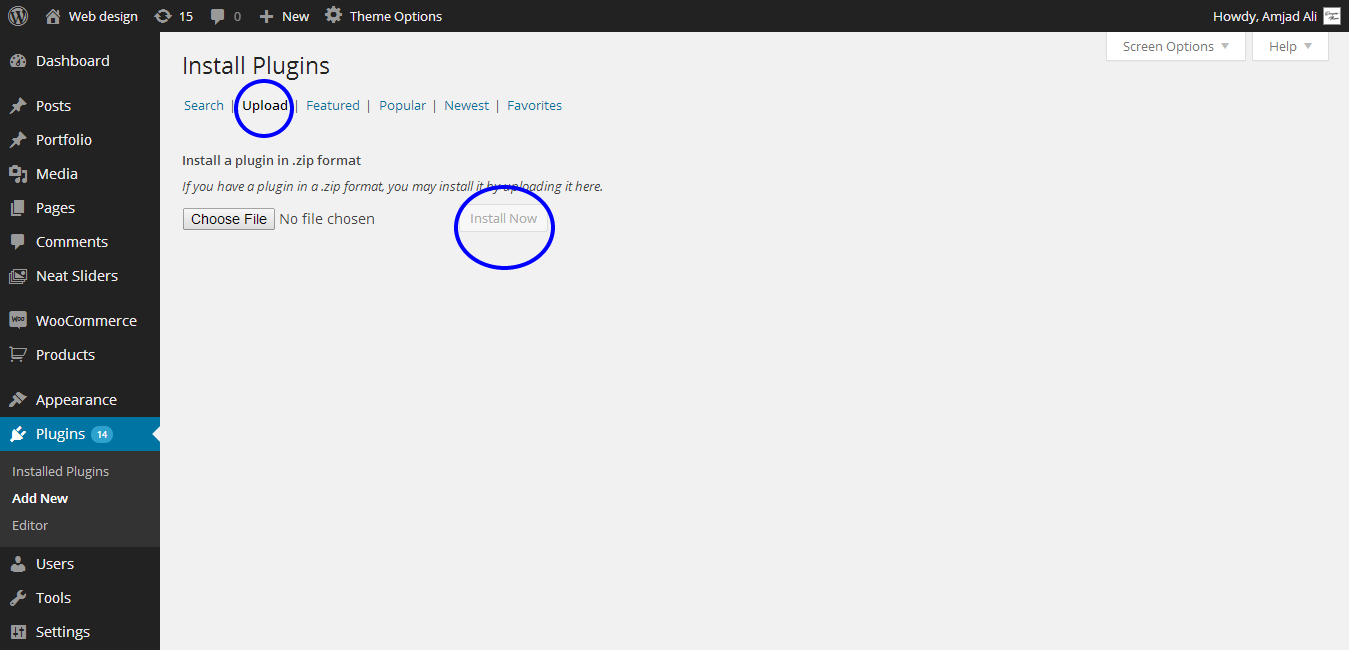
Step 1 - Navigate to Plugins.
Step 2 - Click on Add New and then Click on Upload .
Step 3 - Navigate to find the "neat-slider.zip" file on your computer and click "Install Now"
Step 4 - Now Wait while the plugin is uploaded and installed.
Step 5 - Click on "Activate"
FTP Installation
Follow the steps below to install theme via FTP.
Step 1 - Log into your hosting space via an FTP software
Step 2 - Unzip the neat-slider.zip file and only use the extracted neat-slider folder
Step 3 - Upload the extracted neat-slider plugin folder into wp-content > plugins folder
Step 4 - Activate the newly installed plugins. Go to Plugins and activate it.
Importing The Demo Content
We have include the exported XML file from our demo, this allows you to quickly set up your slider the same way our demo is set up. Instructions on how to do this are below.
Install and activate these plugins before you proceed: Neat Slider.
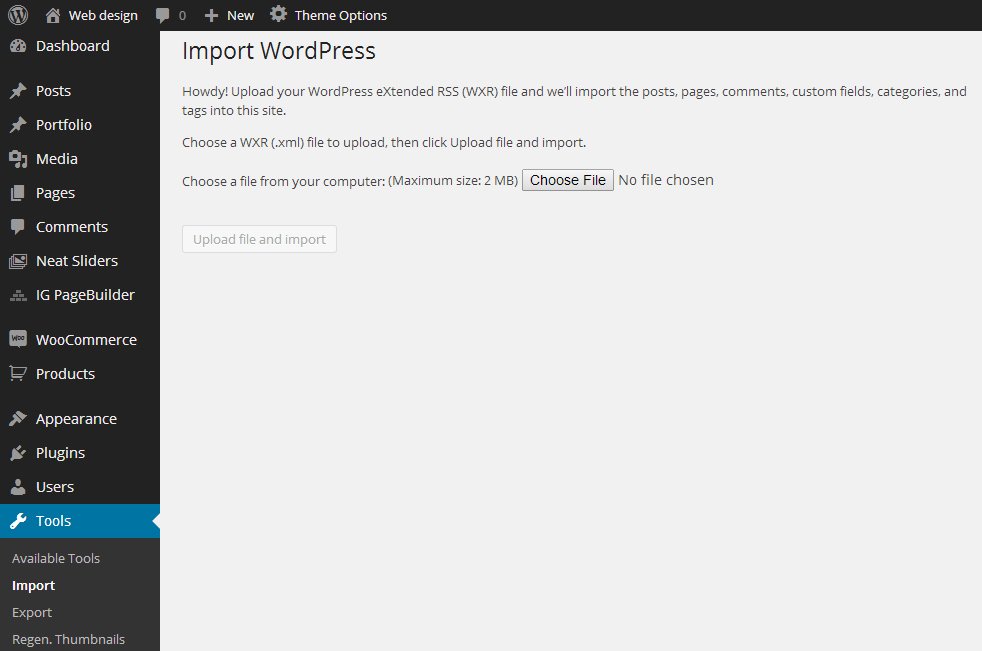
Step 1 - Navigate to WP Admin -> Tools -> Import.
Step 2 - Select and install WordPress importer.
Step 3 - Select the XML file and upload it. It will in few minutes install and upload all content with images.
Neat Slider
Neat Slider is a super smooth and easy to use. Neat Slider let you create easily image galleries and content sliders width mind-blowing slideshows simple elegant effects.
Create Slider
Follow the steps below to Create Slider.
If you dont install and activate Neat Slider then install and active neat slider
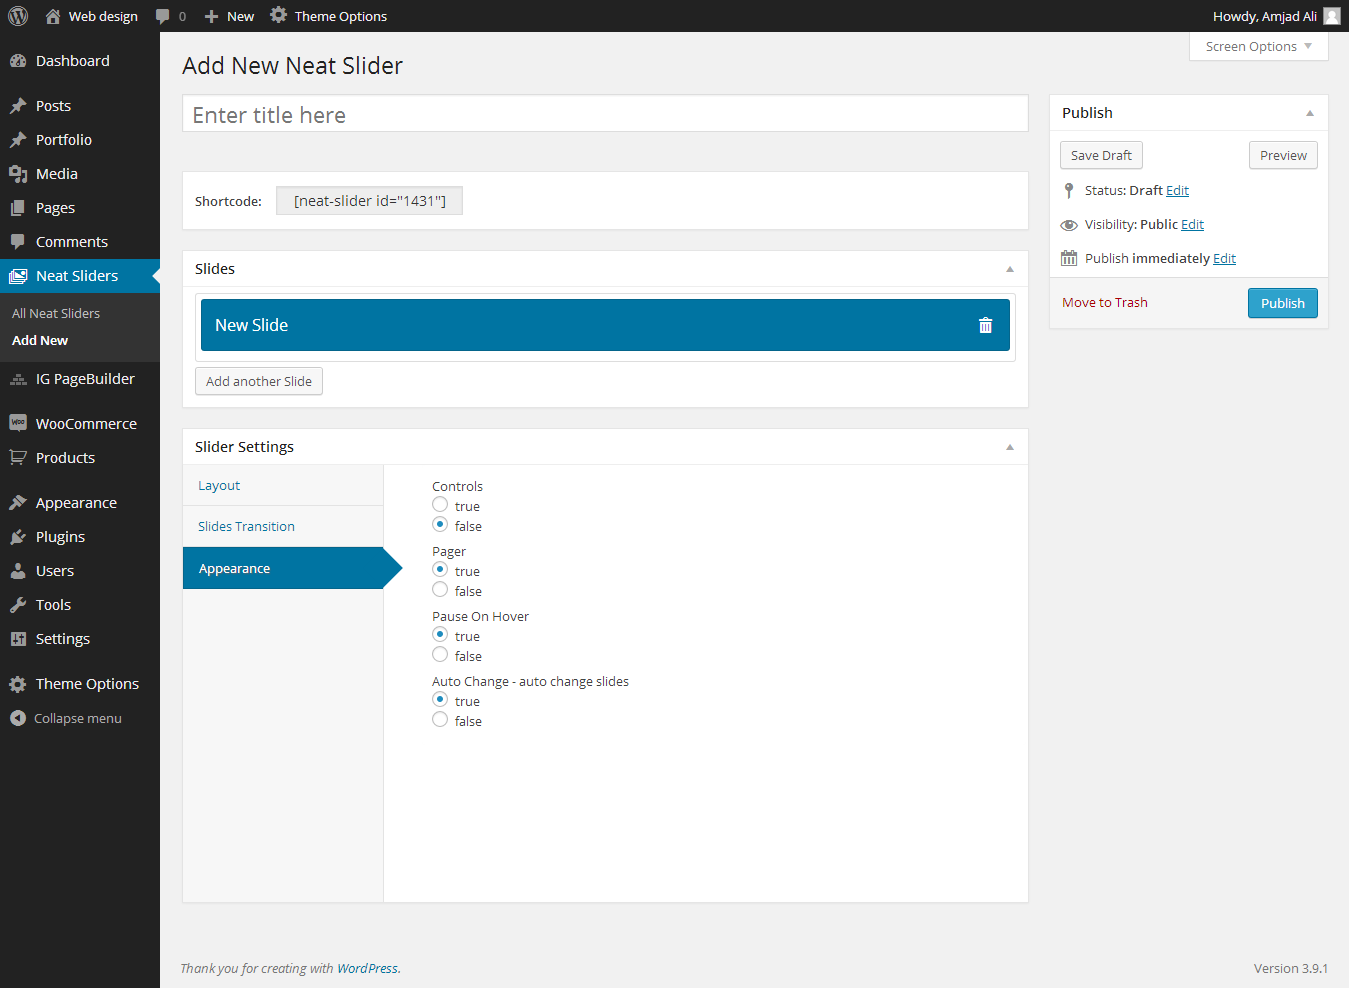
Step 1 - Navigate to Dashboard > Neat Sliders and clicke on "Add New".
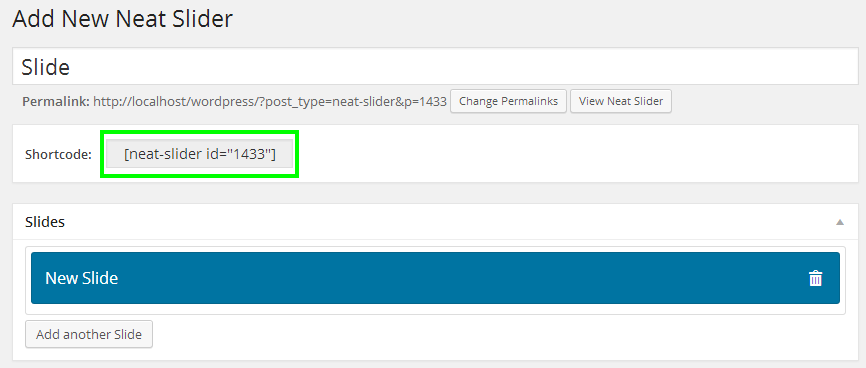
Slider Settings
Once you Created a Slider, you can open the Slider Settings any time to manage any general settings per Slider
Slider width and height - Slider width and height in which slider content will show.
Full-width - If you set "true" slider will adopt full width according to user full browser size and slider width and height will that you set will remain. If you set "false" slider will adopt that size given
Create Slide
Follow the steps below to Create Slide.
You will see one slide created by default if you need more slide just hit on "Add another Slide"
Slide Title - Set Slide Title for current slide for identifying easily.
Slide Image - Slide Image is mean image of your slide.
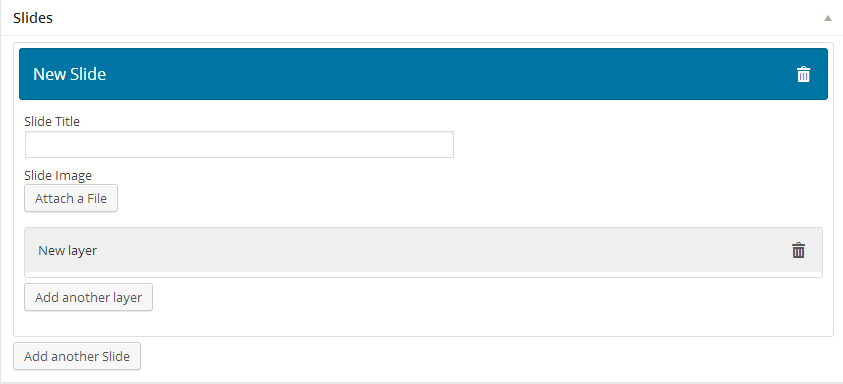
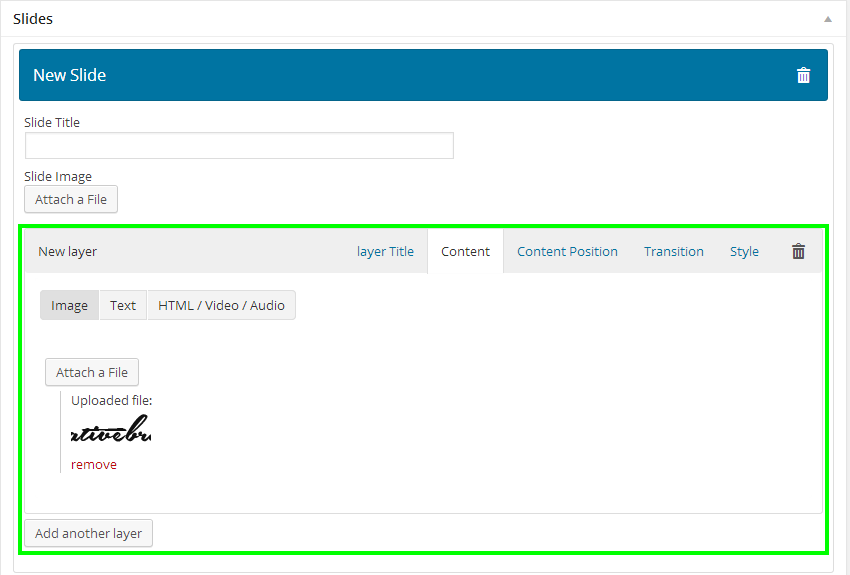
Create Slide Layer
Follow the steps below to Create Slide Layer.
Layer let your elements float on Slide Image (like captions)
You will see one slide Layer created by default if you need more slide just hit on "Add another Layer"
Layer Title - Set Layer Title for current Layer for identifying easily.
Content - You can choose from following layers / captions to put content: Image, Text and HTML / Video / Audio.
Content Position - position of the layer inside the slider. Format: “top,left” in pixels.
Transition - Here you can set transition of layer.
Style - You can set your custom css style to current layer
Use Slider On Page
When you create a slider you will see a shortcode under the title and just before slides copy this shortcode and paste in page or post where you want to show slider just all that you have done.
Credits:
Special thanks to : www.fieldmanager.org and www.fractionslider.jacksbox.de
Thanks for images Angelo González, Daniele Zedda, unsplash.com and picjumbo.com